A necessary disclosure: some of the links in this article contain our affiliate information. It means that if you follow such links and order a service from the company, we may receive a small commission from them for sending them a customer (you). Keep in mind, however, that we don’t give the recommendations just because of the commission, we only recommend our partners because they are extremely good at what they do: we use their services ourselves!
If you have a WordPress-powered web site and you want to finally jump on that CDN bandwagon everyone is talking about, it’s very easy to set up.
If you lived under a rock during the last few years and don’t know why would you need a CDN (Content Delivery Network), here is an elevator pitch: the CDN lets you speed up the delivery of the static files (such as the images, CSS, JavaScript) and make your web site respond faster. And a faster web site is good not only for your human visitors, but also for the SEO (the faster your web site, the better it will rank in the Google search results.)
One of the more popular CDN providers is MaxCDN, which we’ve been using for our primary web site WinAbility.com for about a year now, and are very happy about. It offers a control panel that you can use to set everything up manually, but if your web site is running on WordPress, there is a WordPress plugin that does all the necessary configuration for you. Here is what to do, step, by step:
0. (Optional) If you are familiar with HTML and want to see exactly what CDN would do to the HTML code of your web pages, you may want to save the page source of your main page, to be able to compare it with the new code after enabling the CDN. Here is how the HTML source of this web site (softblog.com) looked like before we have enabled the CDN for it:
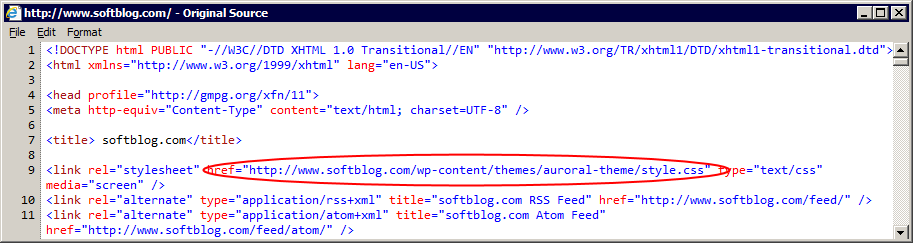
The page source before enabling MaxCDN
1. Open an account with MaxCDN. It’s easy and free, and they offer a free trial. There is also a 25% off offer for the new customers, if you want to take advantage of that.
2. Install the W3 Total Cache plugin into your WordPress site. After you activate it, it will add some speed to your site out of the box, and one of the options it offers on its menu is the CDN integration:
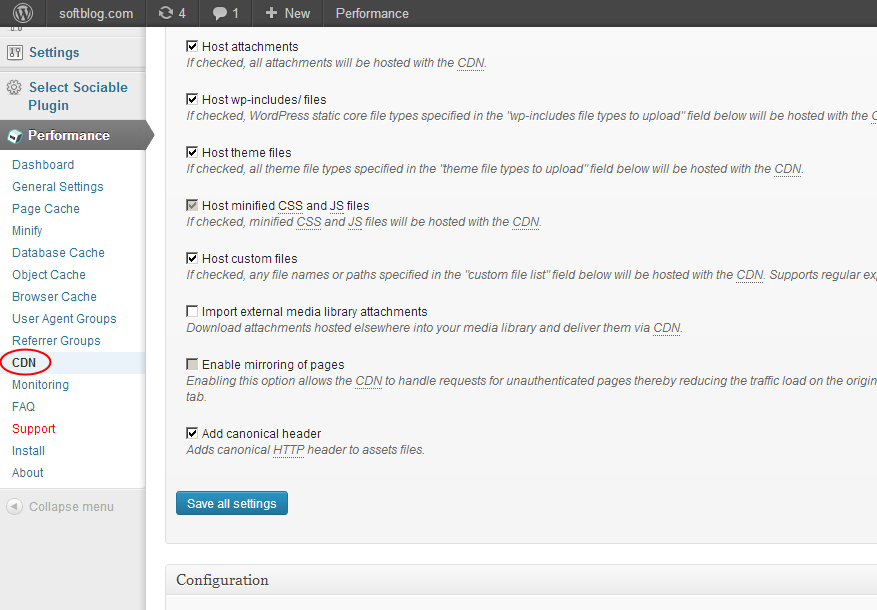
Total Cache plugin offers the CDN option on its menu
3. Select CDN from the menu on the left, and Total Cache should ask you to autorize access to your MaxCDN account:
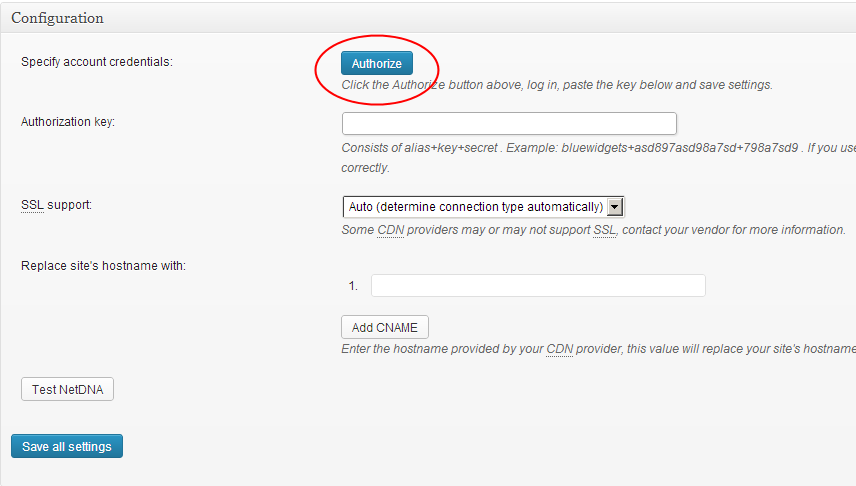
Authorize access to the MaxCDN account
Press the Authorize button, and you will be taken directly to a special web page at MaxCDN with your authorization key pre-formatted. Copy it, go back to your WordPress admin panel, and paste it there. Press the Save all settings button, and on to the final step:
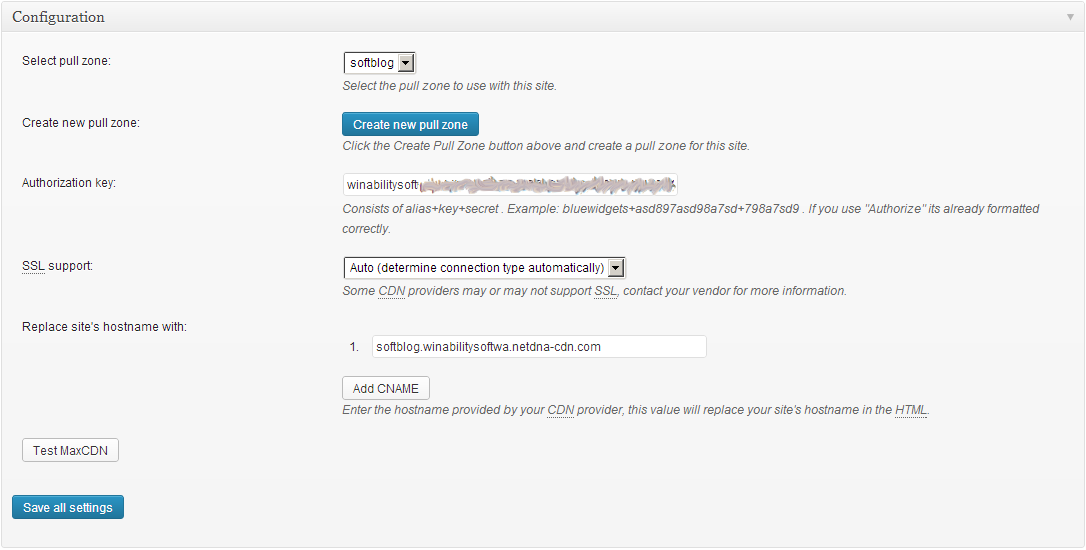
Create and select a pull zone to serve your files from the CDN
4. Create a pull zone (by pressing the Create pull zone button, of course):
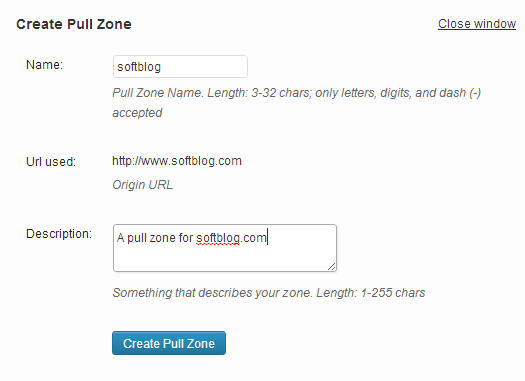
Create a pull zone
What is a pull zone, you might ask? Think of it as a special CDN service that pulls files from your main server and delivers them to the end user when the user is opening your web page. MaxCDN also supports the push zones, which work in about the same way as the FTP servers, but we won’t use them here for now.
Anyway, for this web site (softblog.com) I have entered softblog as the name for the pull zone, to distinguish it from other pull zones I have previously created for other web sites. After the zone is created, make sure it is selected on the CDN page of the Total Cache plugin, as shown above. Press Save all settings button once again, and your CDN is now set up!
If something is wrong, look at the top of your WordPress admin page: Total Cache is good about detecting problems and telling you exactly what to do to fix them. If no problems are reported, congratulations, all done, your WordPress site now uses MaxCDN!
5. (Optional) Look at the page source of your web site again; ours has the following:
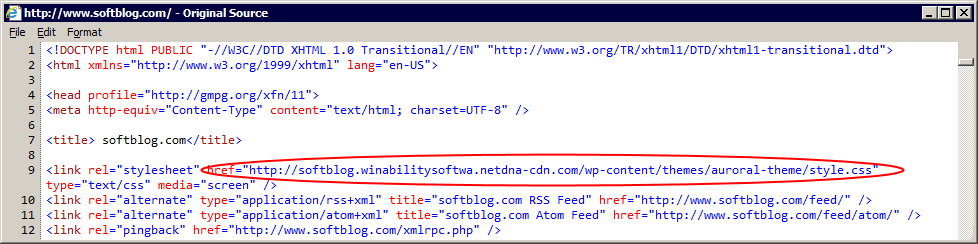
Page source after MaxCDN is configured and enabled
Compare it with the page source you obtained before enabling MaxCDN, see the difference? The CSS file is now served from the CDN pull zone. The same should be true for other static files and images. From now on, if someone from the other half of the globe opens your web page, they don’t need to wait for the static files to travel all around the world to reach them, MaxCDN will deliver the files to the user’s browser from the closest location.
Happy word pressing!